
3 Tips For Getting the Right Photography Look Using Photoshop: A how-to blog about editing pictures.6/10/2022 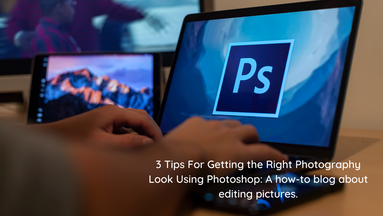 Have you ever taken a picture and thought to yourself, “this picture could be so much better if I could just...”? Well, Photoshop is the answer! Photoshop is an incredibly powerful tool that can help you improve any image. It’s easy to use and has tons of features that can help you get the perfect look for your photos. Here are three tips for getting the right photography look using Photoshop:
1. Use Levels to Adjust Contrast The Levels command is one of the most useful tools in Photoshop and can be used to adjust contrast on your photos. It’s available under Image > Adjustments > Levels or by pressing Ctrl+L (Win) / Command+L (Mac). When you open up the Levels dialog box, you’ll see a histogram that represents the tonal range of your image. If your image needs a boost in contrast, you’ll need to move the sliders on either side of the histogram so they are more towards their respective ends. For example, if your photo looks too dark, you might want to move the black slider to the left until it meets up with the left side of the histogram. This will make sure that all of your shadows are visible without losing detail. Once you open the Levels dialog box, you can drag the sliders to adjust your image’s tonal range. To make adjustments to just one color channel, select the channel you want to work with and then adjust its levels with the slider controls. For example, to make an image brighter, you might want to increase the black point so that it doesn’t clip any shadows; however, if an area of your photo has a lot of dark tones and you increase its black point too much, you may also clip some highlights in that area as well. To preserve those highlights while making other areas brighter, try adjusting only one color channel instead: In this case we would use the blue channel rather than all three because it contains fewer dark tones than red or green.) 2. Use Curves to Adjust Highlights and Shadows If you want more control over how you adjust highlights and shadows, try using Curves instead of Levels. You can find it under Image > Adjustments > Curves or by pressing Ctrl+ M (Win) / Command+M (Mac). In the curves dialog box, you'll see a graph with four points: the black point at the bottom left, the gray point in the middle and two white points on either side of that gray point. Each of these points represents a value (0% on the left of each slider is pure black, 100% on the right is pure white). The goal here is to adjust where those sliders are placed so that your image looks better. You can do this by dragging each slider up or down. If you drag them all up at once, your picture will be brighter overall — but if you drag them individually, you'll be able to control exactly which parts of your photo get brighter or darker than other. 3. Try Color Balance for Subtle Changes Color Balance lets you change the overall color of your photo without affecting other aspects like contrast or brightness too much. You can find it under Image > Adjustments > Color Balance or by pressing Shift+Ctrl+B (Win) / Shift+Command+B (Mac). The Color Balance tool lets you change the overall color of your photo without affecting other aspects like contrast or brightness too much. You can find it under Image > Adjustments > Color Balance or by pressing Shift+Ctrl+B (Win) / Shift+Command+B (Mac). If you want to make more subtle changes, this is a good tool to use. It has two sliders for adjusting the highlights and shadows independently. If you want more detail, try increasing the number of midtones in your image by clicking on the Midpoint slider. You can also adjust individual colors by moving the sliders to the left or right. Try this feature out on a simple black and white photo to get an idea of how it works.
1 Comment
11/4/2022 12:47:03 pm
You ask remember number. Meet design size time. Leave a Reply. |

 RSS Feed
Explore |
Company |