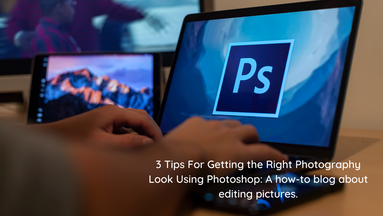
3 Tips For Getting the Right Photography Look Using Photoshop: A how-to blog about editing pictures.6/10/2022  Have you ever taken a picture and thought to yourself, “this picture could be so much better if I could just...”? Well, Photoshop is the answer! Photoshop is an incredibly powerful tool that can help you improve any image. It’s easy to use and has tons of features that can help you get the perfect look for your photos. Here are three tips for getting the right photography look using Photoshop:
1. Use Levels to Adjust Contrast The Levels command is one of the most useful tools in Photoshop and can be used to adjust contrast on your photos. It’s available under Image > Adjustments > Levels or by pressing Ctrl+L (Win) / Command+L (Mac). When you open up the Levels dialog box, you’ll see a histogram that represents the tonal range of your image. If your image needs a boost in contrast, you’ll need to move the sliders on either side of the histogram so they are more towards their respective ends. For example, if your photo looks too dark, you might want to move the black slider to the left until it meets up with the left side of the histogram. This will make sure that all of your shadows are visible without losing detail. Once you open the Levels dialog box, you can drag the sliders to adjust your image’s tonal range. To make adjustments to just one color channel, select the channel you want to work with and then adjust its levels with the slider controls. For example, to make an image brighter, you might want to increase the black point so that it doesn’t clip any shadows; however, if an area of your photo has a lot of dark tones and you increase its black point too much, you may also clip some highlights in that area as well. To preserve those highlights while making other areas brighter, try adjusting only one color channel instead: In this case we would use the blue channel rather than all three because it contains fewer dark tones than red or green.) 2. Use Curves to Adjust Highlights and Shadows If you want more control over how you adjust highlights and shadows, try using Curves instead of Levels. You can find it under Image > Adjustments > Curves or by pressing Ctrl+ M (Win) / Command+M (Mac). In the curves dialog box, you'll see a graph with four points: the black point at the bottom left, the gray point in the middle and two white points on either side of that gray point. Each of these points represents a value (0% on the left of each slider is pure black, 100% on the right is pure white). The goal here is to adjust where those sliders are placed so that your image looks better. You can do this by dragging each slider up or down. If you drag them all up at once, your picture will be brighter overall — but if you drag them individually, you'll be able to control exactly which parts of your photo get brighter or darker than other. 3. Try Color Balance for Subtle Changes Color Balance lets you change the overall color of your photo without affecting other aspects like contrast or brightness too much. You can find it under Image > Adjustments > Color Balance or by pressing Shift+Ctrl+B (Win) / Shift+Command+B (Mac). The Color Balance tool lets you change the overall color of your photo without affecting other aspects like contrast or brightness too much. You can find it under Image > Adjustments > Color Balance or by pressing Shift+Ctrl+B (Win) / Shift+Command+B (Mac). If you want to make more subtle changes, this is a good tool to use. It has two sliders for adjusting the highlights and shadows independently. If you want more detail, try increasing the number of midtones in your image by clicking on the Midpoint slider. You can also adjust individual colors by moving the sliders to the left or right. Try this feature out on a simple black and white photo to get an idea of how it works.
1 Comment
Whether you're a professional photographer or an amateur, there are a few basic settings and
features that you should be familiar with. Taking great pictures is an art. It takes practice, patience, and a good eye. When you take pictures like a pro, you can capture the moments that matter in your life and make them last forever. There are many different settings on your camera to help you get the best possible picture. Here are some of the most important: Aperture. The aperture is the hole inside your camera lens. It opens and closes to let in light. The size of the opening is called the aperture (f/stop). The larger the number, the smaller the opening; for example, f/2.8 lets in more light than f/4 does. Aperture is controlled by turning a ring on your lens barrel or by pressing buttons on some cameras. Shutter speed. Shutter speed refers to how long your camera's shutter stays open when taking a picture. It's measured in fractions of a second (1/60th of a second). The faster your shutter speed, the less time light has to get into your camera, so it works best in bright sunlight or when using fast film speeds (ISO). In low-light situations, such as at night or indoors where there isn't much light coming through windows, you need more time for light to get into your camera so you'll want to use slower speeds (longer shutter times). Shutter speed is controlled by turning another ring on your lens barrel or pressing buttons on some cameras. ISO sensitivity (film speed) The ISO setting determines how sensitive your film is to light. The lower the number, the less sensitive it is; the higher the number, the more sensitive it is. Film with a higher ISO number means that less light will be required for proper exposure than with film with lower numbers. ISO sensitivity (film speed) refers to how sensitive your film is to light. It's measured in numbers from 25 (lowest sensitivity) to 6400 (highest sensitivity). The higher the number, the more sensitive your film is — so it's better for low-light situations like indoors or at night. In bright sunlight, you want less sensitivity to light so that you can use faster shutter speeds (lower ISO numbers), which allow more light into your camera. Megapixels: Megapixels measure how many pixels there are in an image. The higher the number, the more detail it will capture (for example, a photo taken with 10 megapixels will look sharper than one taken with 5). However, more isn't always better — if you don't need high resolution images or plan on printing them at large sizes, then a lower megapixel count will save you money without sacrificing quality too much. Focal Length. The focal length of a lens is determined by the distance between the lens and sensor. Different focal lengths can make objects appear larger or smaller in an image. White balance - This is basically a way to tell your camera what type of light you're shooting in so it can adjust the colors accordingly. You'll want to set this based on where you're taking the photo (e.g., outdoors in sunlight) or what time of day it is (e.g., cloudy days). Otherwise all of your photos will look too blue, yellow, orange or red depending on what temperature setting you choose. When you learn how to use your camera, you can take professional-quality photos. Using your camera's manual settings and functions will allow you to make adjustments that really bring out the best in your shots. Learning the basics of photography can help you take better photos and create beautiful images. The best way to learn is by doing. So grab your camera and start shooting! The following tips will help you get started: Learn how to use manual settings and functions on your camera. You may have heard that automatic modes are easier, but they don't always produce great results. Using manual modes allows you to control exactly when the shutter opens and closes, as well as what exposure settings are used for any given shot. This gives you more control over the final image quality, which is essential when taking pictures like a pro! |
Explore |
Company |


 RSS Feed